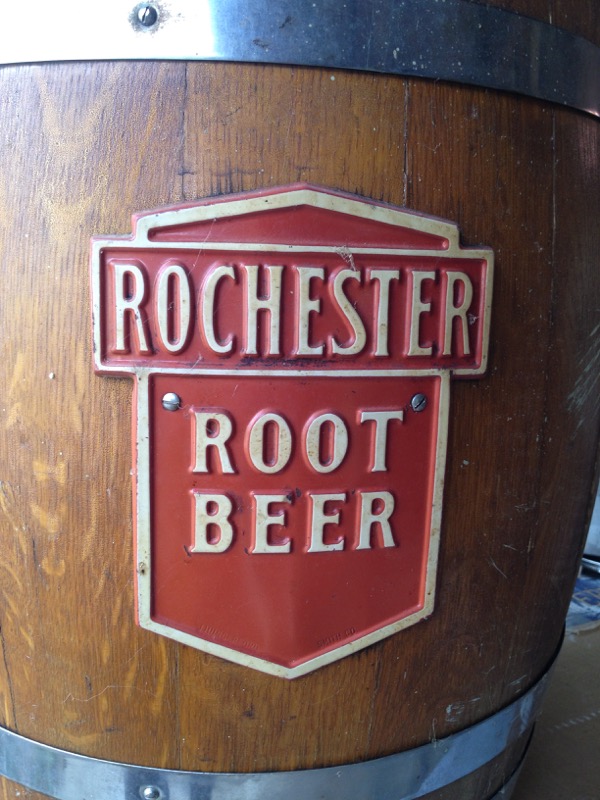
Rochester Root Beer
Restoration of a Classic Root Beer Barrel to Working Order
This Rochester Root Beer Barrel has been sitting in our attic for nearly 50 years.
Now that I have some time, I am going to restore to it's former glory; fit to the task of producing excellent draft root beer.
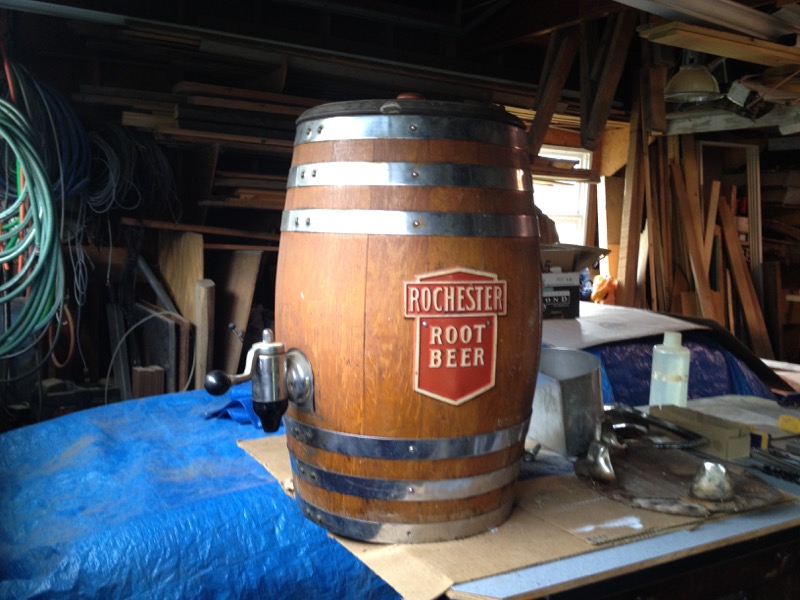
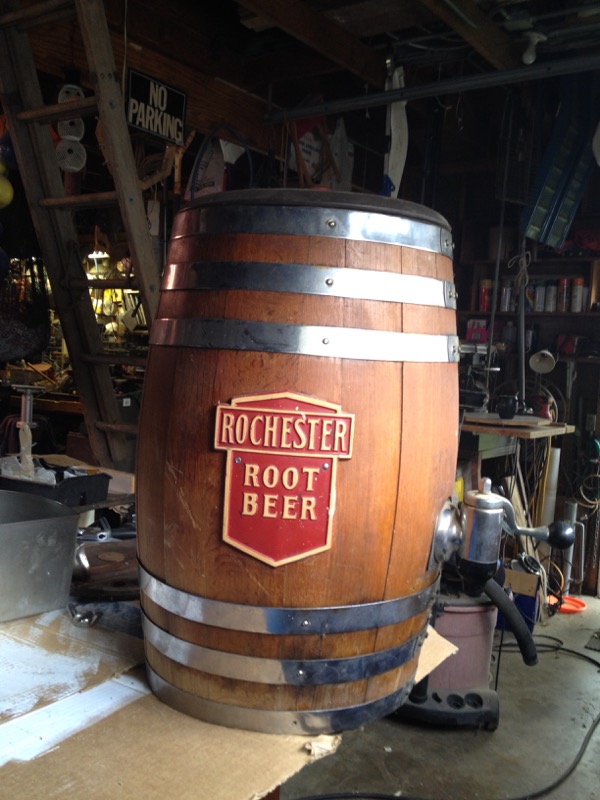
Root Beer Barrel
My wife's parents owned a restaurant in Luck, Wisconsin in the 60's and 70's. This barrel was a functional part of their fountain area (ice cream, floats, soda, sundaes, etc.)
But for whatever reason, this barrel found it's way back to a storage shed where my wife and I (then newly weds) found it. Her parents were glad to be rid of it at the time and we've moved it around with us ever since.
Click on image to enlarge
I don't know very much about how these worked. I don't know what they used for ingredients or where to get them. Does it take some sort of syrup? And how do you get the carbonated water. (The valve in the front seems to want to mix a syrup with carbonated water.)
This barrel itself is the real thing and it needs a little TLC so it would help me to know a little more about haw barrels are made.
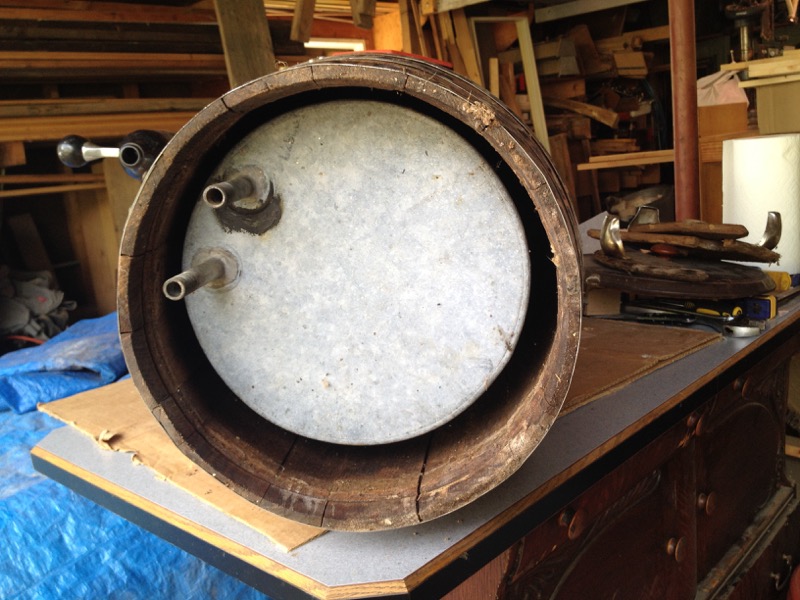
Bottom of the barrel
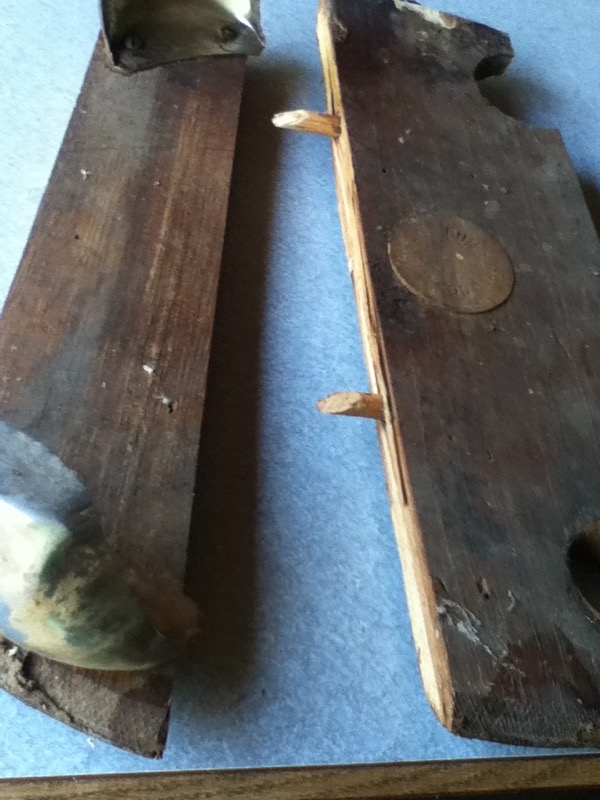
This is the bottom lid for the barrel The legs are attached to this and over the years the weight of the barrel has pushed down on this and forced the lid up out of it's groove and into the barrel. In the process, the glue joints have come apart and in a couple of the joints the dowels have broken.
The entire base is intact and I believe some new dowels and a little glue will fix it just fine.
Follow this link to see the removal of the old dowels explained below.
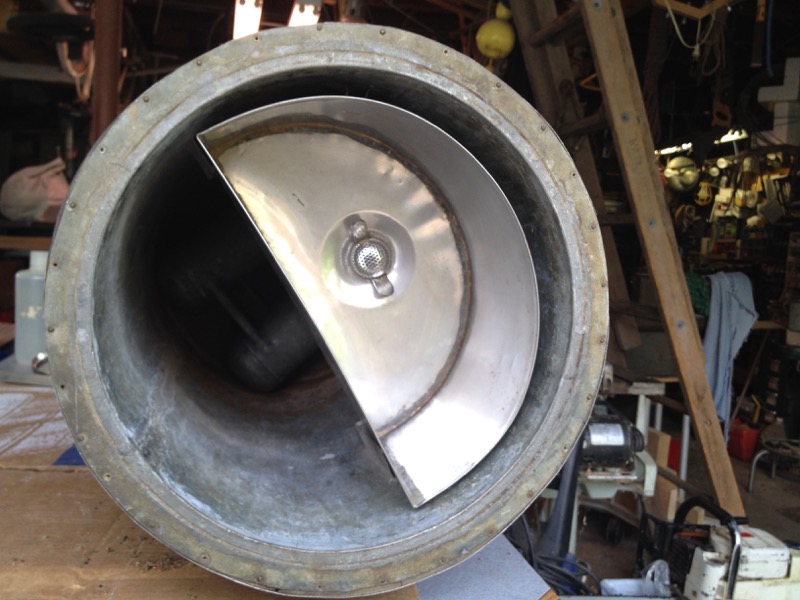
Looking up into the barrel
Here is the galvanized water tank that takes up most of the barrel's volume. There are two pipes coming out of the tank. One just passes through the tank on it's way to the mixing valve. The other terminates at the bottom of the tank where it acts as a drain for the tank.
The area between the galvanized tank and the wooden barrel was filled with perlite insulation.
Click on image to enlarge
This view shows the inside of the tank -- looking down from the top with the wooden lid removed. The lid for the syrup tank is also removed in this picture.
The galvanized outer tank was filled with ice. This kept the syrup cold as well as the carbonated water that flowed in through a couple cooling tanks (located in the dark area under the stainless tank) and then to the mixing valve and into a frosty mug.
Click on image to enlarge
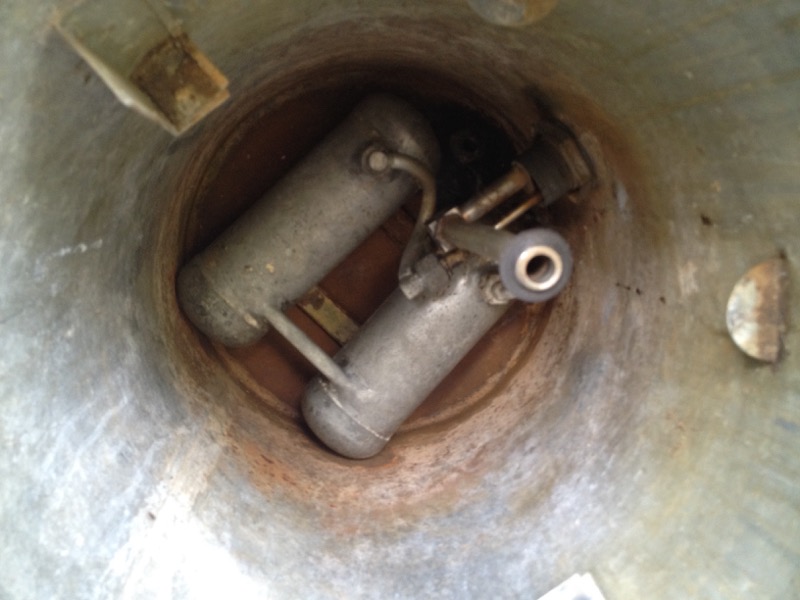
Here the stainless syrup tank has been lifted out and you can see the two cooling tanks for the carbonated water. The syrup supply pipe is seen in the upper right. This leads down to the mixer valve where all things come together.
The tank has been patched in the area around one of the pipe connections. The rustiness seen here seems to be just surface rust. I haven't put water in the tank yet to test for leaks but I don't expect to see any (look at the bottom of the tank to and see that there is no rust apparent.)
Click on image to enlarge
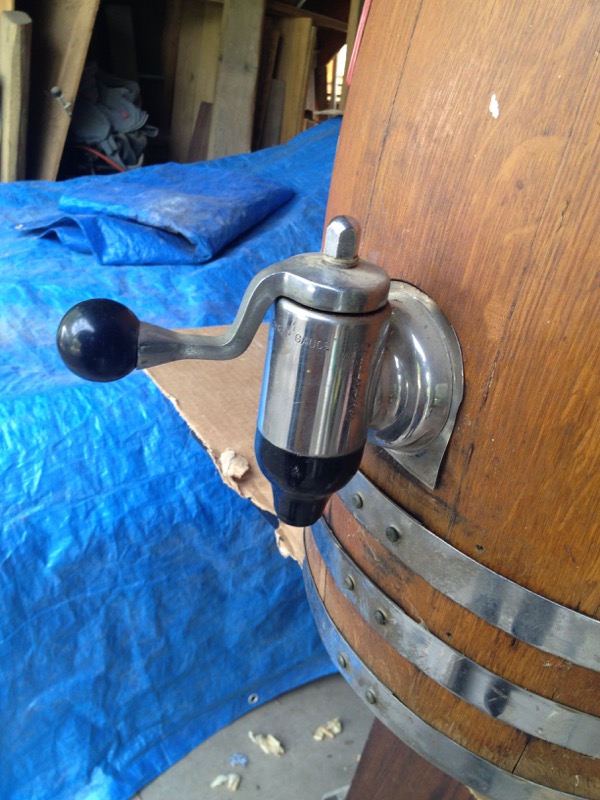
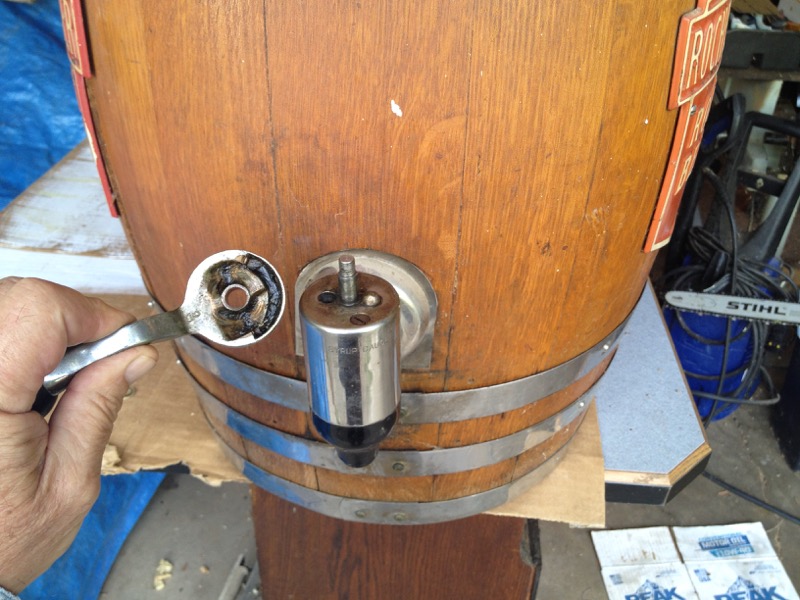
Here is the mixer valve where the syrup and carbonated water are mixed as they flow into the frosty mug. So all the pieces are here.
Now I need is a supply of carbonated water and the root beer syrup.
I can imagine many reasons these things are no longer being used for dispensing root beer:
- It needs to be kept stocked with ice.
- The syrup probably gets old and needs to be refreshed.
- The mixer valve is probably finicky and tends to "gum-up" if not used often.
- The mixer valve may not do that good a job (when compared to modern soda systems - or even compared to bottled products.
But even so, I really want to see for myself by getting this thing to make me a frosty mug of root beer.
Click on image to enlarge
Oh, and BTW the only piece that is missing is a small, bullet-shaped piston piece that is located inside the mixer valve. This is simply a short piece of brass rod that is rounded on one end. I don't think this will be hard to make.
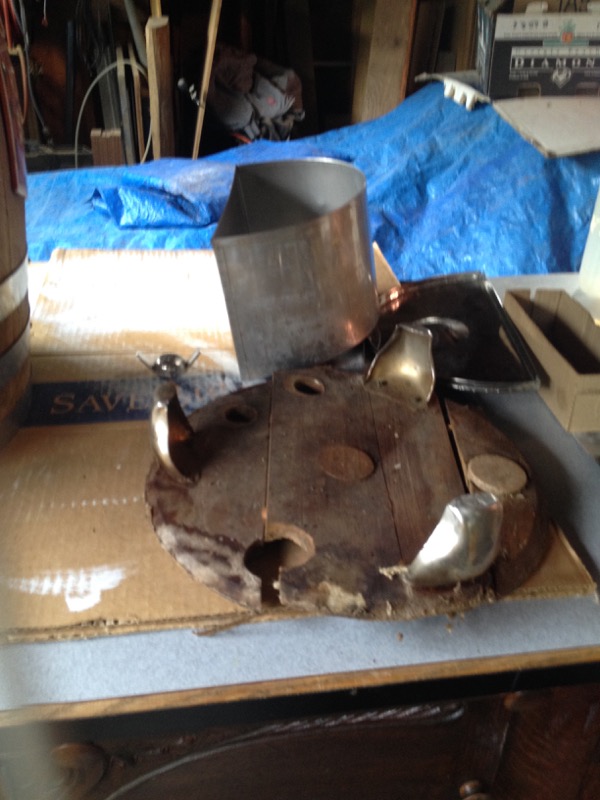
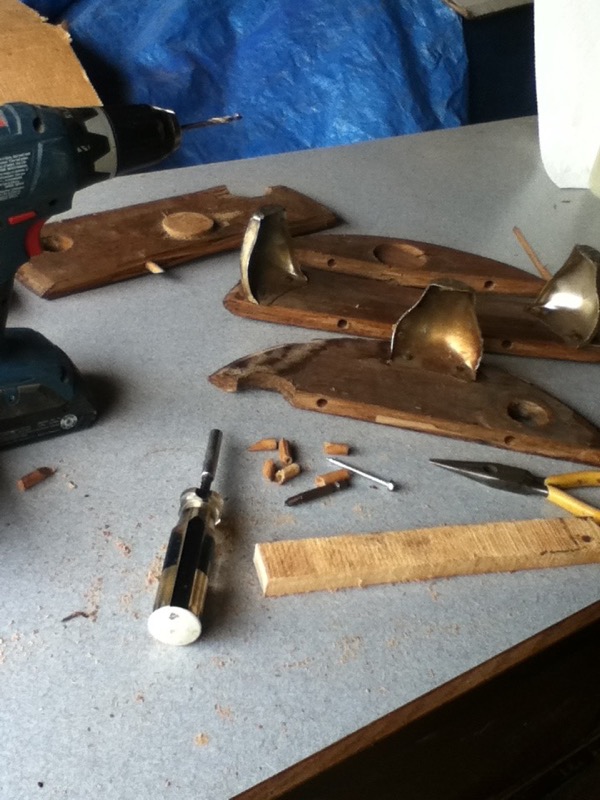
Repairing barrel bottom
Only remaining dowels
All the pieces to the bottom plate fell apart as soon as it was removed from the barrel. These two dowels were the only intact, unbroken dowels. All the rest had broken either cleanly or leaving a short stub on one side.
On one or two I was able to get a grip with a pliers and gently work the remaining dowel out of the hole.
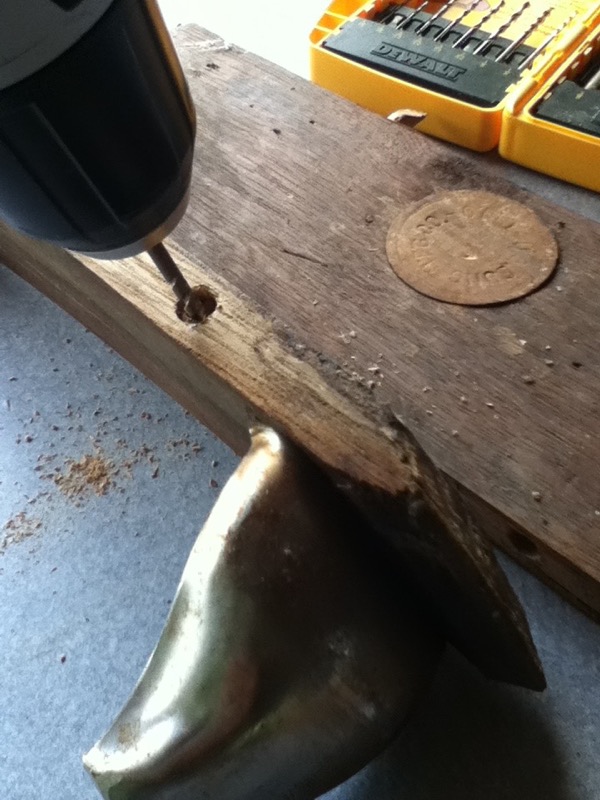
drilling dowel
To remove the dowels that were too short to grab, I carefully drilled a hole through the center of the dowel using a bit that was about half the diameter of the dowel.
Drill all the way through the dowel
click on image to enlarge
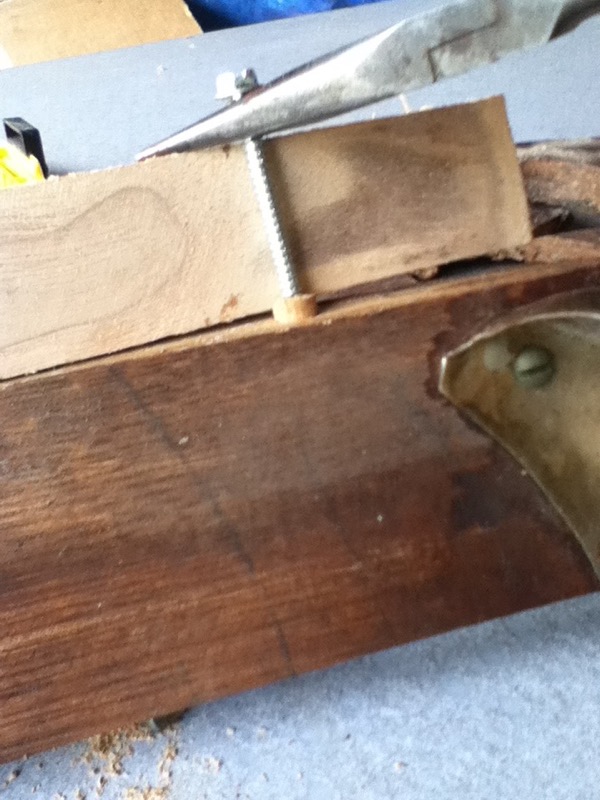
I screwed in a long screw that was sized to fit loosely in the newly drilled hole. Tight enough so the threads grip firmly but not so big that it excerpts pressure on the outside of the dowel and makes it harder to pull out.
I then braced a needle nose pliers against a block of wood and gripped the screw. How I can gently pry the screw out of the board pulling the dowel out with it.
All dowels removed
I repeated this on all remaining dowels. Luckily the glue had dried with age and had lost all it's effectiveness. All the dowels came out easily.
Here you see all the broken dowels and all the sections for the bottom of the barrel. I will get some new dowels and re-glue this disk.