BB Gun Repair
Daisy Red Ryder model repair
I found my Red Ryder many years ago in an antique store on the boardwalk in Myrtle Beach NC. I paid a couple dollars for it because none of us believed it was an antique. I wanted something to scare the squirrels out of our bird feeders without hurting them (too much).
When I got it home I loaded it with some bb's and gave it a try. The gun cocked and fired as if it was a normal bb gun (I had one of these as a child) but I could see the bb fly out of the barrel and travel all of 2 feet as it arced to the ground, landing at my feet.
So it sat in the entryway closet for many years while I pondered what to do next (not a high priority).
I searched the internet for help on this problem but only found sites that described disassembly, etc. These were useful but none of them talked about this problem or it's solution. This is why I am posting this short note. This is what I did to fix it and so far it has continued to work very well (one year later). I hope you find it useful...
Note:This repair was many years ago, now, and the fix has held nicely.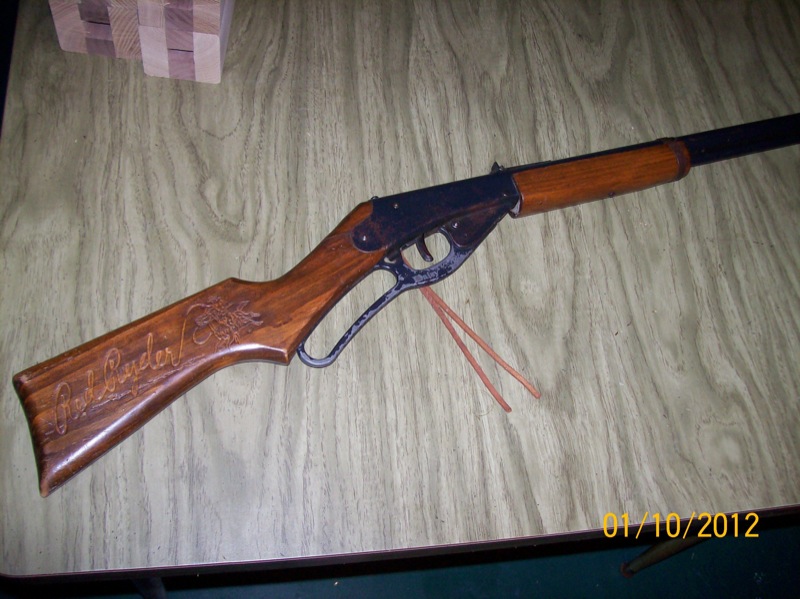
Daisy Red Ryder
Red Ryder BB gun seemed to work fine except there was no compression to propel the BB more than a few feet from the end of the barrel. I searched the internet and found good information on how to take this thing apart without filing off those rivets!! ( I couldn't imagine that was necessary).
Disassembly
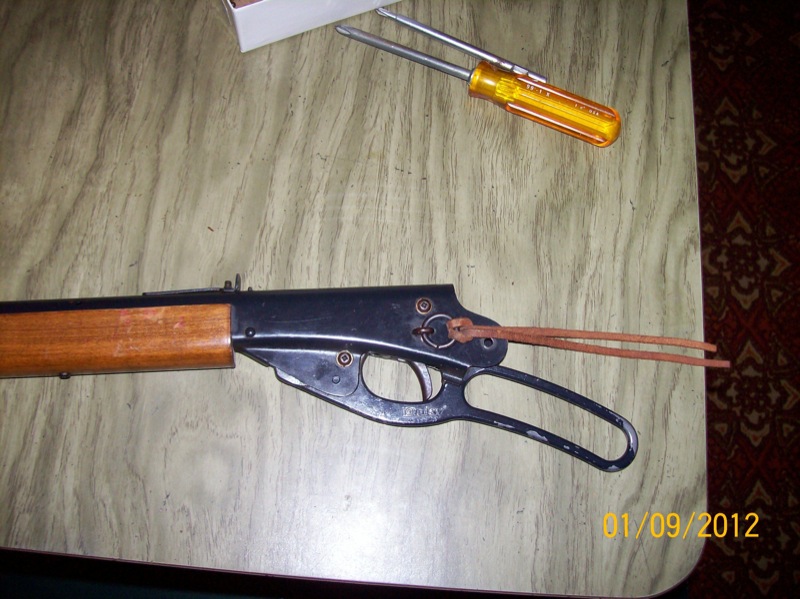
Stock removed
Warning: please do not try this unless you are proficient with tools and have good hand strength. This is a firearm and contains a strong spring that are under continuous compression. The uncontrolled release of this compression could potenentially cause parts to be propelled from the gun assembly and possibly cause injury. Wear eye protection and exercise care. Procede at your own risk.
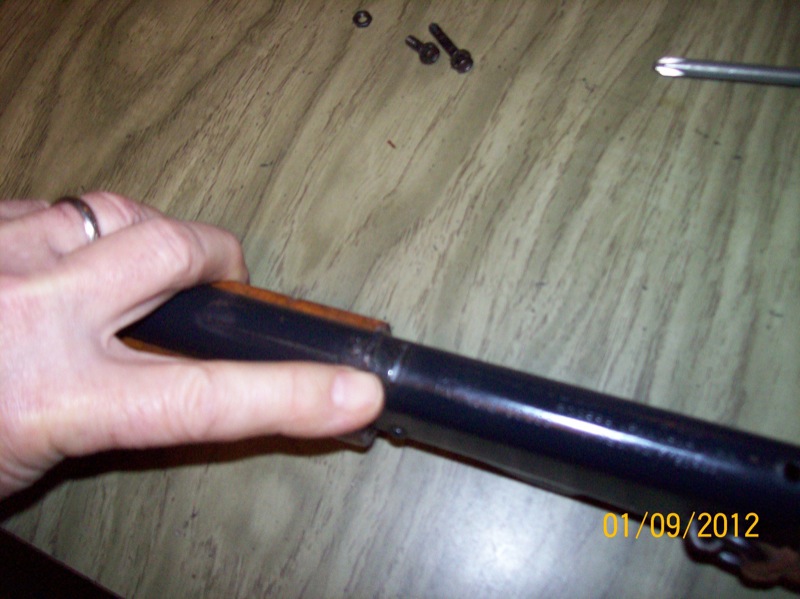
First remove the gun stock by removing the screws that hold it in place.
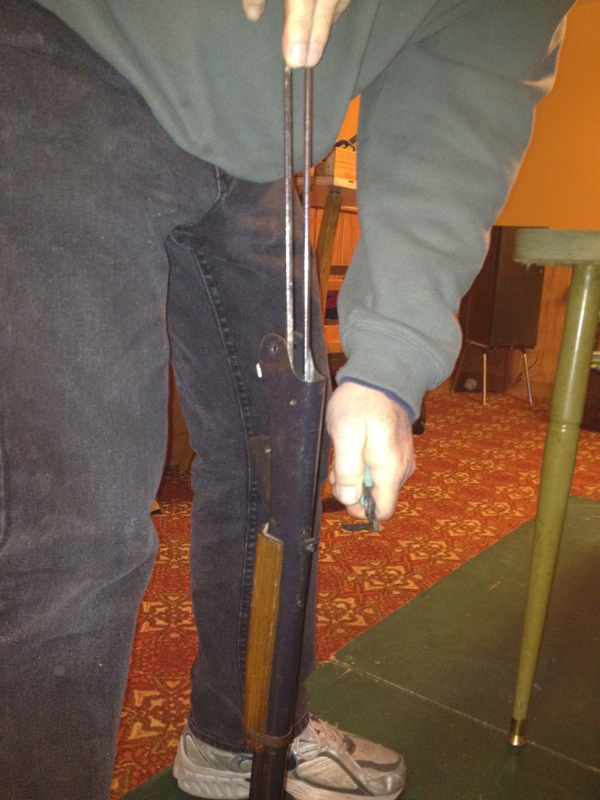
Spring retainer
Next, there is a metal piece that sticks out of the top of the barrel just behind the rear sight. This piece holds the spring-loaded plunger in place and provides the rear stop that the spring is compressed against when the gun is cocked.
This piece must be removed but since the spring is always partially compressed against it (this holds it in place) you need to compress the spring in order to remove this piece.
The trick here is to push down on the spring without pushing on the retainer. If you try to simply use a dowel (or similar) you will be pushing against the retainer and this won't move. You need to bypass the retainer on both sides ( aprox 1/8" gap on each side of the retainer) and make contact with the spring only. This is why we use two small metal rods instead of one large rod (dowel).
Sorry about the blurry image - click on images to enlarge.
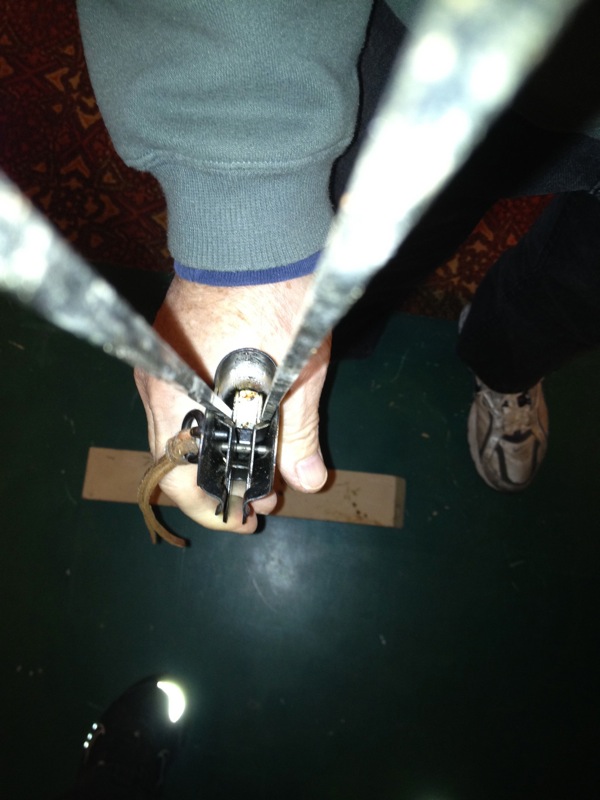
Spring retainer with 'tool' inserted
on either side.
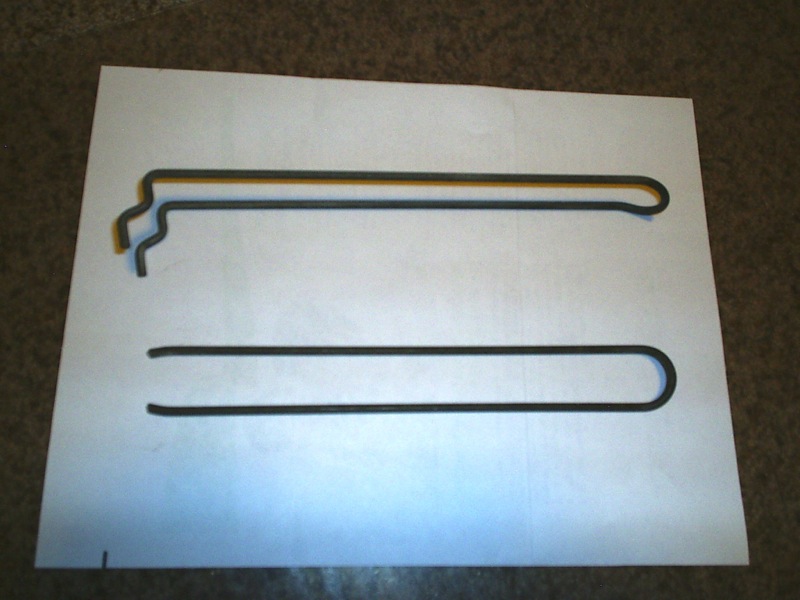
The Google search returned instructions which included fabricating a spring compressor tool made from a piece of flat bar, the width of the inside of the barrel, with a rectangular notch cut out leaving two fingers on each side. There is a gap on both (lateral) sides of the retainer. This allows you to apply pressure to the spring behind the retainer thus compressing it enough to easily slide the retainer out through the top of the barrel.
This picture shows two metal shisk kabob skewers which I used for this part of the operation ( why make a tool when you only expect to do this once - ever ).
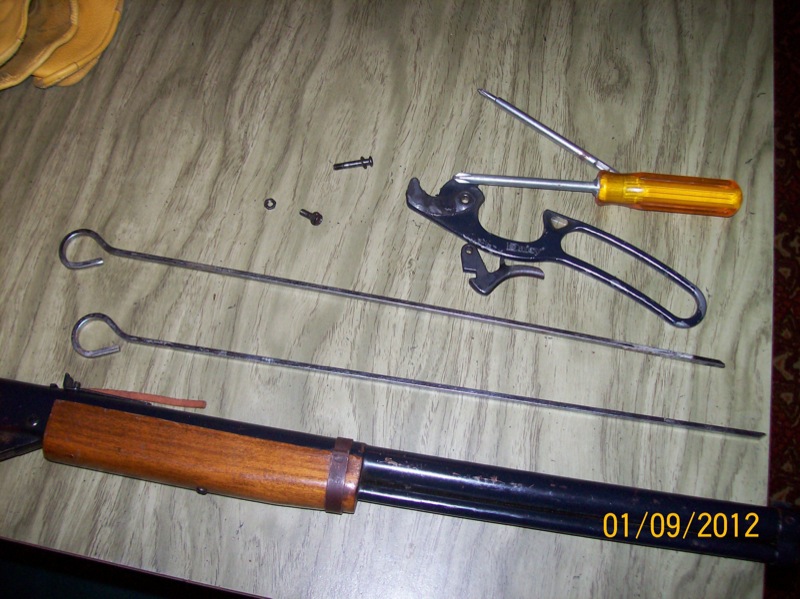
Tools
Here are the tools I used for disassembling this gun. Screw drivers and two metal shish kabob skewers. At this point the trigger assembly and the cocking mechanism have been removed and the gun is ready for removal of the spring-loaded plunger.
Extracting the retainer
Here you see me applying pressure to the spring with the skewers with one hand while pulling out the retainer with the other. When the spring pressure is off it slides out easily.
Please be very careful with this step. The spring is very strong and any slip in this procedure can be dangerous and cause injury.
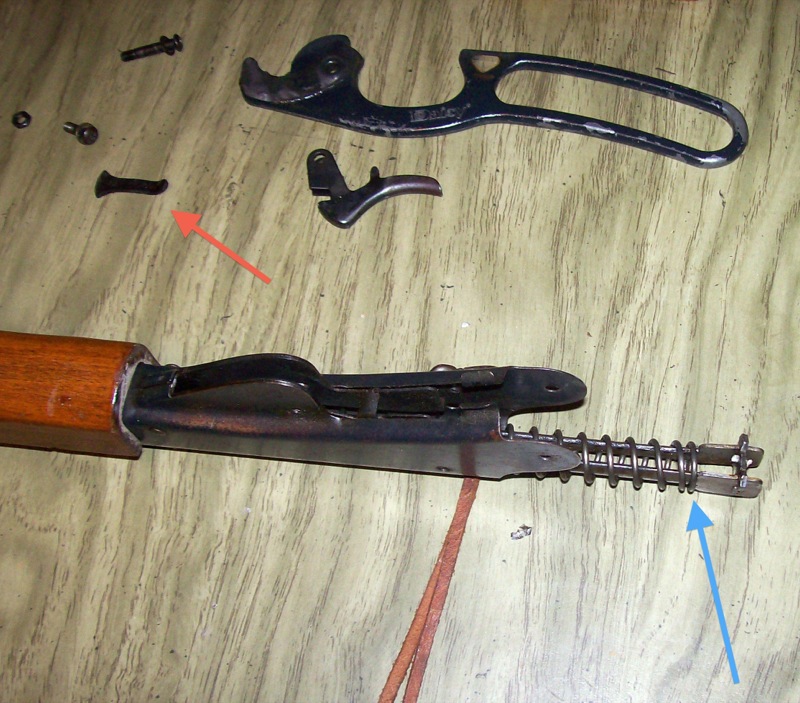
Retainer removed (red arrow)
Spring plunger (blue arrow)
Here are the pieces after removal of the plunger retainer (red arrow).
The plunger is free and partially removed from the gun (blue arrow). It slides easily out of the barrel once the retainer is removed.
Repair
Retainer removed (red arrow)
Spring plunger (blue arrow)
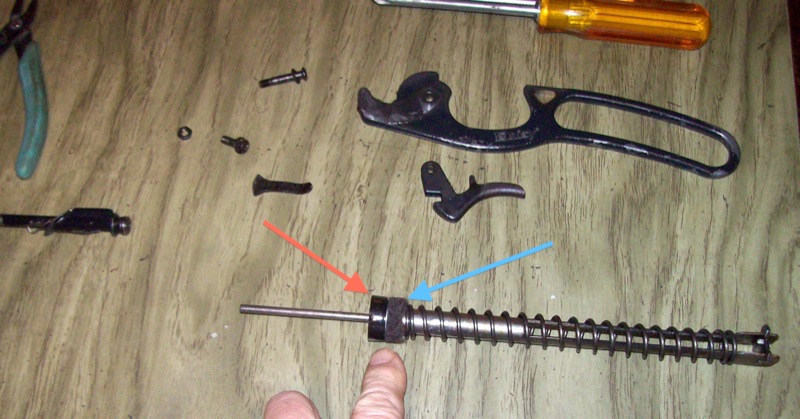
Okay, finally, here we go:
The problem is with the piston assembly that produces the puff of air pressure that propells the BB out of the gun. The air chamber is contained between two seals. These are shown here in the compressed position as they would be after fireing the gun. The red arrow points to the stationairy seal (toward the forward end of the gun). The blue arrow points to the moving seal that slides back and forth with the spring.
The problem with this gun was that the two seals had stuck together (probably from sitting for a long time in the un-cocked possition being pressed together by the spring). So when the gun was cocked the stationairy seal was pulled along with the movably seal and no air chamber was formed and therefor no compression to generate the puff that propelled the BB on it's way.
The fix was simply to separate the two seals, remove the stationairy seal by sliding it off the tube, turn it around and replace it on the tube. This presented a fresh face for the movable tube move against and appeared to be far less likely to stick again. (It's been a couple months since I did this so I don't remember exactly what convinced me to do this but sufice it to say that at the time I remember that it seemed quite obvious).
Re-assembly
So, that's it. Put everything back together in reverse order from removal. Again be careful with the spring compression step. Note that the spring retainer has a bend to it that has to be oriented the same as it was removed. It bends towards the rear of the gun so that the spring wedges it against the slot in the lower part of the barrel - thus holding it in place.
Also be careful to re-install the trigger spring properly so that it provides resistance to the trigger -- otherwise the gun will tend to fire on it's own after cocking (hair trigger) - very dangerous.
I hope this works for you...
Comments and Suggestions:
Email from Kirt dtd April 27,2015
Alternate compression tool
Hello Stuart,
Your blog on BB GUN REPAIR saved my sanity. I had been working on repairing a Daisy 105B for a couple of hours. The mechanisms are very similar to the Red Ryder. I finally got it apart but couldn’t get the spring compressed for re-assembly to save my soul. I tried the metal Shish Kebob skewers, but mine slipped past the spring time after time. But, that gave me the idea of what to use for a tool.
I took a 9” peg board loop, cut the peg board hook parts off, bent the ends in and voila! (picture attached) It took just a few seconds to secure everything. Thank you for your posting. Feel free to add this to your blog if you would like.
Email from Travis dtd March 28,2020
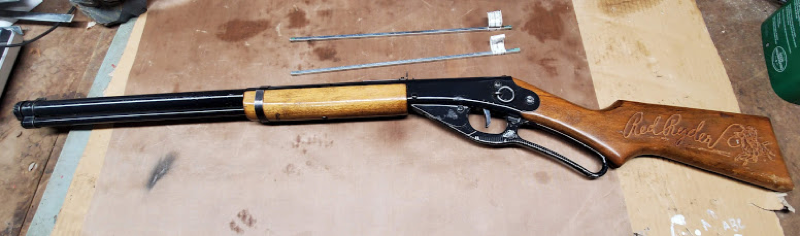
Travis sent some pictures
(Click on image to enlarge)
Hi Stuart
Thanks much for your website on the repair of the Red Ryder BB Gun.
The photos were really helpful in showing the mysteries of the spring inside and your use of square skewers.
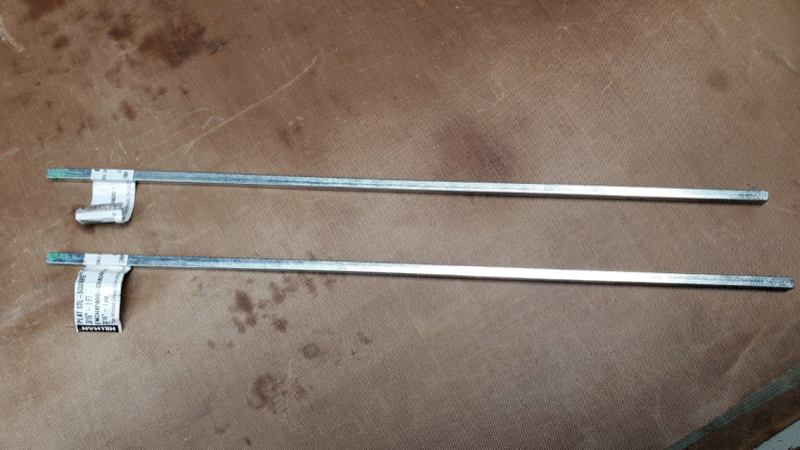
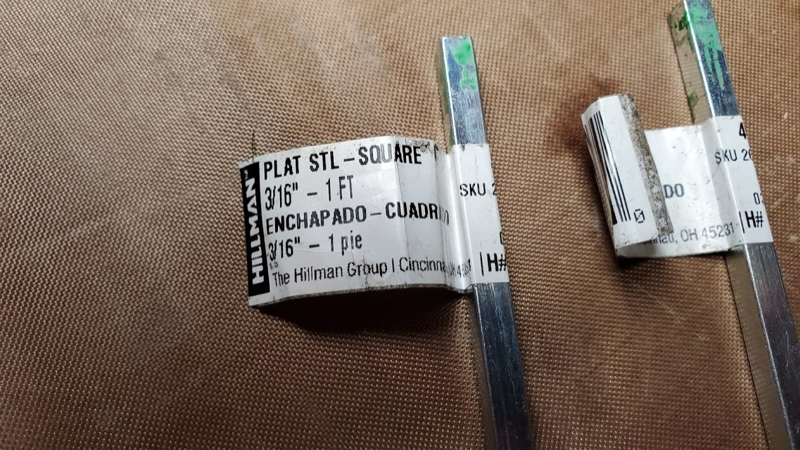
Not many sites have much info other than the blurry parts manuals and none seemed to have the dimensions of the prongs for the "special tool"
I couldn't find skewers but I happened on some 3/16" by 1 foot square stock at the farm store. Took a chance and they were the perfect width and length.
Slid right in each side and was able to just press them against the side of the workbench...
Pro tip, have your barrel right side up cuz that that spring retainer apparently is affected by gravity... luckily it didn't go far and hide like most things do in my garage floor. 😳 Holding it horizontal and upright (sights up) worked much better the second time.
Turns out my felt washer must have gotten dry and shredded up a bit.
So with even more searching, finally found the parts at jg Airguns (I think near Chicago) Just got it put back together for the second time with the new parts and some oil.
I got this in the early 70's. Spent a lot of time with it. Grandpa & I would go out after dark and take care of sparrows in the corn crib and barn. He'd hold the flashlight and I'd take the shots. Good memories.
Thanks again for the help you didn't know you were giving.