Deconstruction: Stage V - Disassembly and salvage of the basement.
Note: this web page is a work in progress. Deconstruction of this barn was begun in June 2011 and I will be documenting it's progress - on this site - as time permits.
This story continues: Summer 2012....
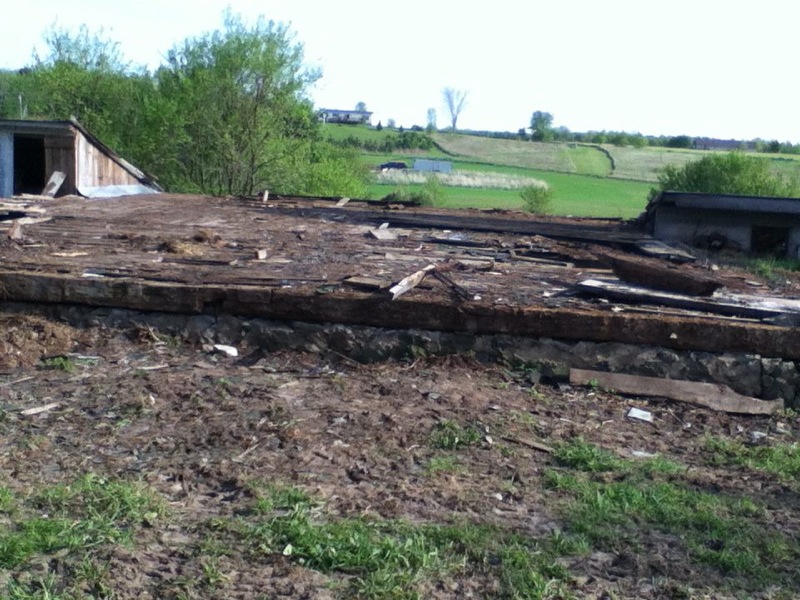
trash cleared off barn floor
All the siding and beams are removed and packed away. All the trash (old hay and other crap left behind in the old hay mow) has been cleared off the deck. Leaving the bare floor - still coated with a layer of dirt - ready to be pulled up board by board.
Some re-building is required already.
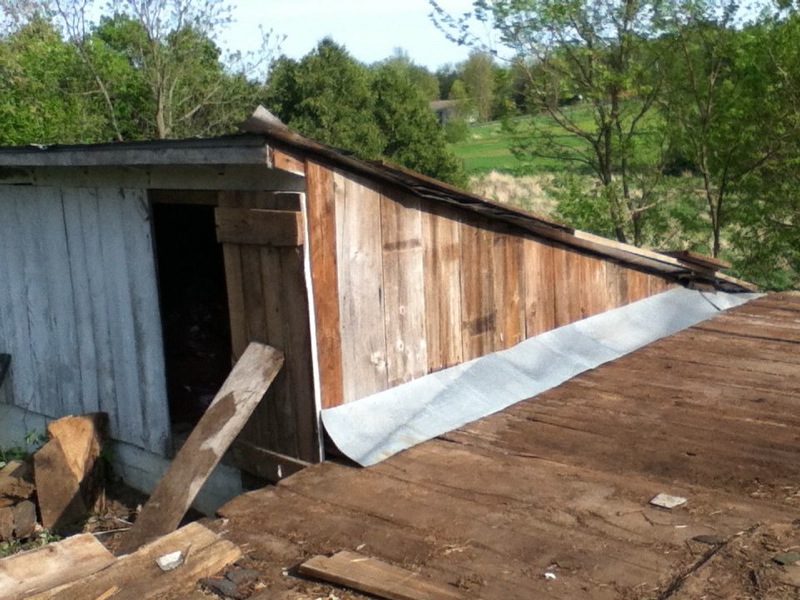
Repairs to the 'attached' milk house
I was very careful, during all phases of this take-down, to spare the milk house. Since it was added on to the barn it used the barn wall for one of it's attic wall (shown here). When the wall pulled away this left a gaping hole that had to be covered to keep the rain out of the insulation, etc..
So this was my first use of the old boards for a 'new' construction project.
I added a temporary flashing until the floor, and the supporting beams, can be removed.
Old haymow floor is ready for lifting.
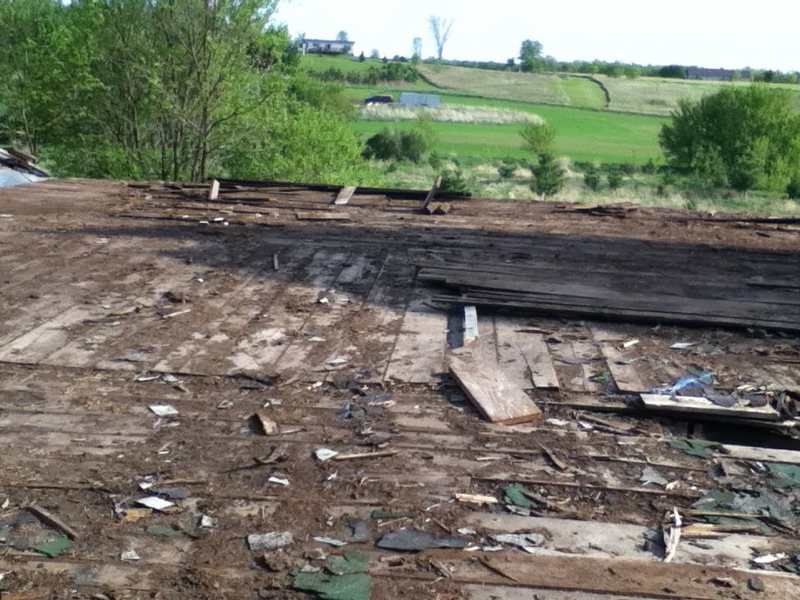
The floor.
There is still a lot of clutter sitting on the old floor after clearing off rotted straw and a lot of little 'crap' that was deposited in the barn over the years (some of it real crap left by the birds that roosted in the rafters.) This makes these boards look bad but they are really in pretty good shape under the layers of dirt. This was made evident when my schedule forced me to leave this project for a month and the summer rain washed many of the boards clean - on the top side, at least.
The floor has two layers of 1x boards. It is divided out in three sections: North, South, and a center section. To provide the added strength to support the tractor and a wagon load of hay the top layer of floor boards in this center section are 2x12's lain cross-ways compared to the rest of the floor boards. The supporting beams, in the basement, are configured differently as well, to provide added strength for this concentrated weight.
Note on the process of loading loose hay into the haymow (this was before balers):
To bring hay into the barn the tractor pulled the loaded hay-wagon up the ramp -- through the big doors -- at the west side of the barn and into the middle section of the haymow(which was never filled with hay). When the wagon was centered in the barn, the tractor was unhooked from the wagon and driven out onto the ramp at the east side of the barn where it was stopped (usually by shutting off the engine - since tractor brakes never seemed to work very well) and connected to the large hay rope.
When the hay was loaded onto the wagon in the field the person on the load (who spread the hay on the wagon with a pitchfork - and great sense of balance), lays a pair of smaller ropes (called slings), in parallel from front to back on the wagon, first on the floor of the wagon and then when the hay reached 4-5 feet in depth.
Once the wagon is in the barn the ends of these ropes are attached to a lift system (carrier) that first lifts the sling-load up to the roof of the barn where it trips a lever that locks the lift and then allows the carrier to pull the hay down a track (which runs along the peak of the barn roof), either to the north mow or the south mow, where it is dumped by releasing one end of the slings (with a trip rope mechanism). The power for this process comes from tractor pulling that heavy hay rope through a series of pulleys. It's an impressive process that is always accompanied the sounds of the tractor that's pulling with all it's might, and by the creaks from the stretching rope and the groans of barn beams straining under the load.
You learn very quickly to give this process a wide birth since it's not uncommon for something to break which sends ropes whipping around and creates an avalanche of a ton of falling hay.
Forced Break in the Action

Barn Swallow nest
As I was lifting floor boards (ceiling boards in the basement) I came upon this nest of barn swallow eggs. There were a half dozen or so mating pairs of swallows maintaining nests in the beams of the barn basement.
I carefully replaced these boards and stopped my work until the swallows could hatch and fledge. As it turns out these birds have multiple broods and I couldn't resume this project until late in august when the last brood left for the year. I hope they can find other nesting sites when they return next year. These guys are very nice to have around.
Meanwhile; more salvage - there's always something to do.
Lots of wiring and other metal to remove
While I waited for the birds to move on I had plenty of other things to do:
- Remove all of this wiring - either for re-use or to sell for the copper.
- Remove fixtures and switches.
- Remove steel pipe for the vacuum system that powered the milkers.
- Remove the copper pipe for the drinking cups.
- Remove the stanchions and drinking cups.
- And finally the vacuum pump had to come down from it's perch just under the ceiling.
Then I carefully removed all the windows - I don't need a lot of broken glass laying around.
More to come (after June 2012) ...

Camper.
Were I hang out on some of these trips to the farm. A 1967 model Avion (not Air Stream).
Back at it.
While the birds were still there - in the rafters underneath this floor - I could remove the top layer of the floorboards without disturbing them. At this time the bottom layer was fairly wet so it was easy to pull up the top layer. I removed the nails and stacked these boards on the tractor forks with stickers between the layers.
Most of these 1 inch boards were 12 foot long 1 X 12's. There are a few 1X18's.
One side is pretty well cleaned by the rain but the other side is still 'muddy'. I was thinking of pressure washing these boards before packing them away but that would slow me down too much. If I'd had help I would have done this. It can be done later - as long as it doesn't interfere with drying.
Fall 2012: The birds are fledged and gone. It's time to procede...
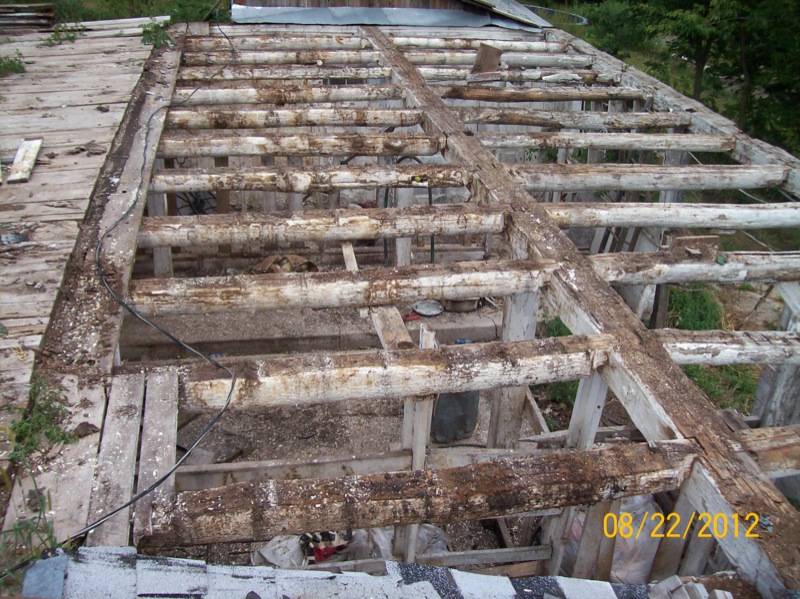
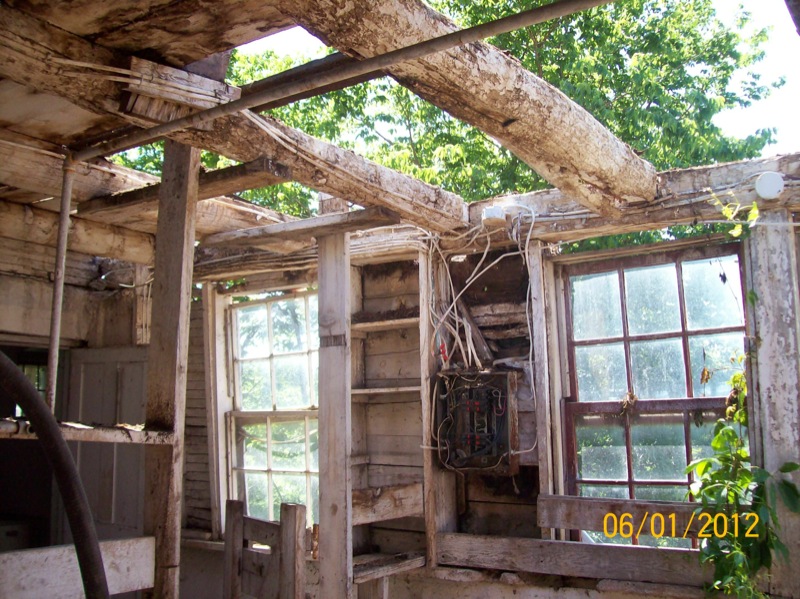
Exposed rafters and beams.
I continued peeling the floor boards off of the south end which explsed the underlying support beams and rafters. Everything looks pretty rough but this is mostly due to the staining from rainwater infiltrating through the cracks in the floor boards (which had a century worth of hay dust and other dirt trapped between the layers.
Here you can see the tongue and groove joinery in the support rafters. Each of these cross beams can be lifted out of the notch in the main rafter that holds it. Each of these rafters spanned the entire 35 foot width of the barn in one continuous piece of wood.
Stacking the boards.
The haymow floor was two layers of inch boards. When I removed the boards from the bottom layer they were still a bit wet so I continued to place stickers between them as I stacked them on the tractor forks. This was so the air could circulate and dry the boards completely.
I first removed the south section and then the north, leaving the center section for last. This was because these outside sections had the boards running from side to side of the barn while the center section had them running lengthwise. Yeah, I know, but it made sense at the time - and it still does but I'm not explaining it very well. It all had to do with where I could park the tractor and carry the boards the shortest distance as I removed them - without falling through to the basement.
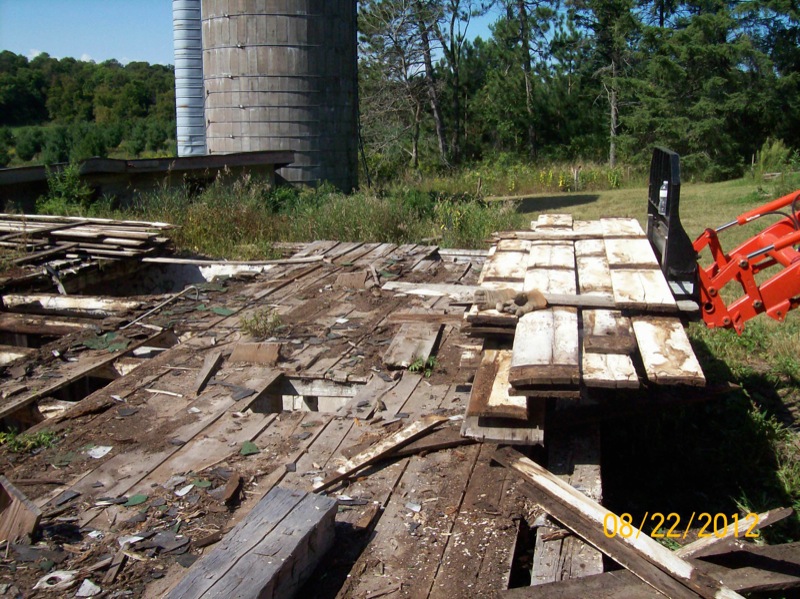
North end - peeled.
The last load of floor boards from the north end. These boards, and the exposed beams that remain, don't look like much because of the white wash and the staining from the rain filtration. But when they are cleaned up they are still in good shape and could easily be used as flooring or sheeting and still give support to a new structure. But right now I am only conserned with getting them under cover and out of the weather once again.

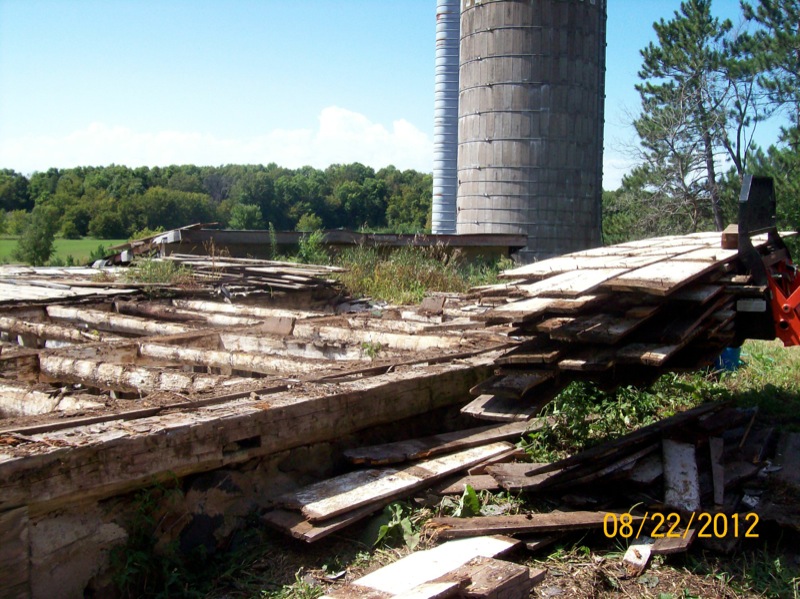
First course of cross beams removed.
Each stage of this project presented it's own challenges. Like how to lift the cross beams out of their pockets. I was sure they weren't fastened in the notches because none was needed.
It turns out that I could position the tractor diagonally against the north wall and get one of the forks under each beam - in turn - and lift it out of it's notches. It would fall into the basement where it would stay until I got all the rafters down and could drive in through the lower barn door in the south end.
Once all the cross beams were remove in the first course, it was a simple matter to connect a chain to the main beam and pull it to the side thus dropping the next course of cross beams into the basement. I then pulled the main beam out 'through' the window notch in the foundation (shown at bottom of this picture).